
久し振りのkotlinネタ。
画面遷移についてはいろいろとやり方があるらしいですが、画面遷移は大体が画面全体を遷移させるのが普通?らしいですが、俺がやりたいのは一部分のみを遷移させたいんですわ。
んで、javaで作っていた時は、LayoutInflaterを使用して画面遷移していましたが、この方法がkotlinでは使えないとのことで、どうしたもんかなぁと苦慮しておりましたらば、フラグメント(fragment)を使うのが現在一般らしいとグーグルさんがようやく教えてくれましたw
前回もいろいろと調べてはいたんですが、何故かその時はヒットせず長い間悶々としていました。
んで、サンプルなどを交えて実際にちょこっとコーディングしてみました。
まずは、こんな感じで画面遷移させたい
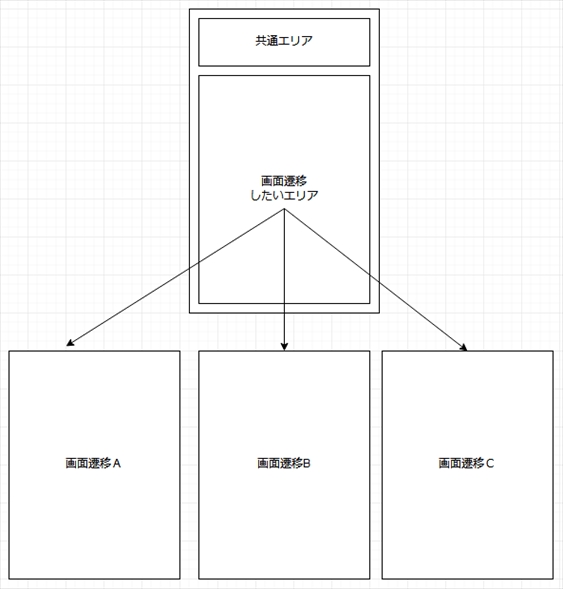
イメージはこのとおりです。
このイメージ図は、下記のサイトで作成しました。いやぁすんげぇ楽にイメージが作成できるのは嬉しいですね!

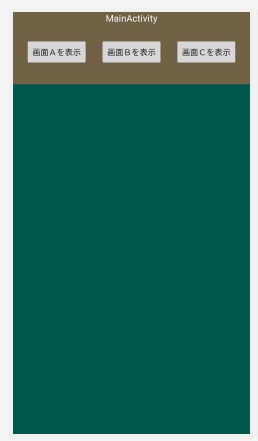
メイン画面
画面イメージ
構成

Layoutコーディング・ソース
<?xml version="1.0" encoding="utf-8"?>
<android.support.constraint.ConstraintLayout
        xmlns:android="http://schemas.android.com/apk/res/android"
        xmlns:tools="http://schemas.android.com/tools"
        xmlns:app="http://schemas.android.com/apk/res-auto"
        android:layout_width="match_parent"
        android:layout_height="wrap_content"
        tools:context=".MainActivity" android:id="@+id/main" android:background="@color/backgroundcolorMainScreen">


    <TextView
            android:text="@string/activity"
            android:layout_width="wrap_content"
            android:layout_height="wrap_content"
            android:id="@+id/mainTitle_Text" android:textSize="16sp" app:layout_constraintStart_toStartOf="parent"
            app:layout_constraintHorizontal_bias="0.5" app:layout_constraintEnd_toEndOf="parent"
            app:layout_constraintTop_toTopOf="parent" android:textColor="#ffffff"/>
    <Button
            android:text="@string/button_a"
            android:layout_width="wrap_content"
            android:layout_height="wrap_content"
            android:id="@+id/main01_Button"
            app:layout_constraintStart_toStartOf="parent" app:layout_constraintHorizontal_bias="0.5"
            app:layout_constraintEnd_toStartOf="@+id/main02_Button" android:layout_marginTop="24dp"
            app:layout_constraintTop_toBottomOf="@+id/mainTitle_Text"
    />
    <Button
            android:text="@string/button_b"
            android:layout_width="wrap_content"
            android:layout_height="wrap_content" android:id="@+id/main02_Button"
            app:layout_constraintTop_toTopOf="@+id/main01_Button"
            app:layout_constraintStart_toEndOf="@+id/main01_Button" app:layout_constraintHorizontal_bias="0.5"
            app:layout_constraintEnd_toStartOf="@+id/main03_Button"/>
    <Button
            android:text="@string/button_c"
            android:layout_width="wrap_content"
            android:layout_height="wrap_content"
            android:id="@+id/main03_Button"
            app:layout_constraintTop_toTopOf="@+id/main02_Button"
            app:layout_constraintStart_toEndOf="@+id/main02_Button" app:layout_constraintHorizontal_bias="0.5"
            app:layout_constraintEnd_toEndOf="parent"/>
    <FrameLayout
            android:layout_width="0dp"
            android:layout_height="694dp"
            android:layout_marginTop="32dp"
            app:layout_constraintTop_toBottomOf="@+id/main01_Button" app:layout_constraintStart_toStartOf="parent"
            app:layout_constraintEnd_toEndOf="parent" app:layout_constraintHorizontal_bias="0.0"
            android:background="@color/backgroundcolorFragmentView" android:id="@+id/FragmentView">

    </FrameLayout>
</android.support.constraint.ConstraintLayout>
MainActivityのコーディング・ソース
package com.example.fukurausagiandroid.tesetfragment

import android.support.v7.app.AppCompatActivity
import android.os.Bundle
import android.widget.TextView
import kotlinx.android.synthetic.main.activity_main.*

class MainActivity : AppCompatActivity() {

    override fun onCreate(savedInstanceState: Bundle?) {
        super.onCreate(savedInstanceState)
        setContentView(R.layout.activity_main)

        val titleView: TextView = findViewById(R.id.mainTitle_Text);
        titleView.setText("Fragmentによる一部の画面を切り替えるテスト");

        // ボタンを押す:画面Aを表示
        main01_Button.setOnClickListener {
            val fragment = Fragment_A()
            val fragmentManager = this.getSupportFragmentManager()
            val fragmentTransaction = fragmentManager.beginTransaction()
            fragmentTransaction.replace(R.id.FragmentView, fragment)
                               .addToBackStack(null)
                               .commit()

        }


        // ボタンを押す:画面Bを表示
        main02_Button.setOnClickListener {
            val fragment = Fragment_B()
            val fragmentManager = this.getSupportFragmentManager()
            val fragmentTransaction = fragmentManager.beginTransaction()
            fragmentTransaction.replace(R.id.FragmentView, fragment)
                .addToBackStack(null)
                .commit()

        }

        // ボタンを押す:画面Cを表示
        main03_Button.setOnClickListener {
            val fragment = Fragment_C()
            val fragmentManager = this.getSupportFragmentManager()
            val fragmentTransaction = fragmentManager.beginTransaction()
            fragmentTransaction.replace(R.id.FragmentView, fragment)
                .addToBackStack(null)
                .commit()

        }


    }
}
javaと違いkotlinはスゴク簡潔なソースとなり多くのコーディングが必要でなくなったのには嬉しいですねぇ。javaだとこの倍?くらいはコーディングしないとアカン。
数行で収まるのは良い。
遷移先表示A用のフラグメントを作成
左上にあるappを選択して右クリック。【New】→【Fragment】→【Fragment(Blank)】と選択します。
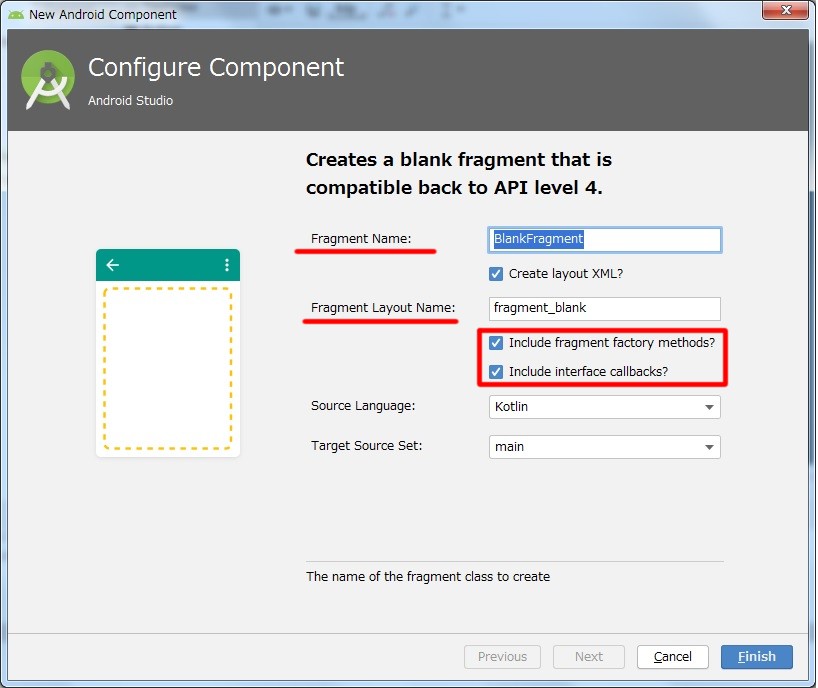
すると、上のような画面が出てきますので、画面遷移に表示させたい画面とクラスを同時に作成します。
赤ラインで示した「Fragment Name:」と「Fragment Layout Name:」にそれぞれ名前を入力します。
それから赤枠で示したところはデフォでチェックが入っていますので今回は敢えて外します。ぶっちゃけそのままでも良いですが、チェックがあると雛形を自動で作成してくれます。
まぁ、今回は画面表示だけなので雛形は要らないですw なので、下記のようにセット。
Fragment Layout Name:fragment_a
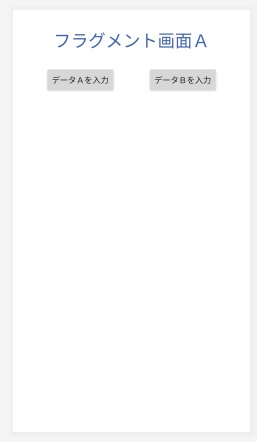
fragment_aのLayout
画面イメージ
構成
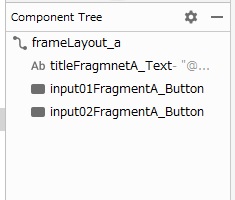
Layoutコーディング・ソース
<?xml version="1.0" encoding="utf-8"?>
<android.support.constraint.ConstraintLayout xmlns:android="http://schemas.android.com/apk/res/android"
                                             xmlns:app="http://schemas.android.com/apk/res-auto"
                                             xmlns:tools="http://schemas.android.com/tools"
                                             android:layout_width="match_parent"
                                             android:layout_height="match_parent"
                                             tools:context=".Fragment_A" android:id="@+id/frameLayout_a"
                                             android:background="@color/backgroundcolorFragment_A">


    <TextView
            android:text="@string/Fragment_A_Txt01"
            android:layout_width="wrap_content"
            android:layout_height="wrap_content"
            android:id="@+id/titleFragmnetA_Text"
            app:layout_constraintTop_toTopOf="parent"
            android:layout_marginTop="32dp" android:textSize="30sp" android:textColor="@color/Fragment_A_TxtColor1"
            app:layout_constraintStart_toStartOf="parent" app:layout_constraintHorizontal_bias="0.5"
            app:layout_constraintEnd_toEndOf="parent"/>
    <Button
            android:text="@string/Fragment_A_Button1"
            android:layout_width="wrap_content"
            android:layout_height="wrap_content"
            android:id="@+id/input01FragmentA_Button" app:layout_constraintStart_toStartOf="parent"
            app:layout_constraintHorizontal_bias="0.5"
            app:layout_constraintEnd_toStartOf="@+id/input02FragmentA_Button" android:layout_marginTop="24dp"
            app:layout_constraintTop_toBottomOf="@+id/titleFragmnetA_Text"/>
    <Button
            android:text="@string/Fragment_A_Button2"
            android:layout_width="wrap_content"
            android:layout_height="wrap_content"
            android:id="@+id/input02FragmentA_Button"
            app:layout_constraintTop_toTopOf="@+id/input01FragmentA_Button"
            app:layout_constraintStart_toEndOf="@+id/input01FragmentA_Button" app:layout_constraintHorizontal_bias="0.5"
            app:layout_constraintEnd_toEndOf="parent"/>


</android.support.constraint.ConstraintLayout>
クラスfragment_aのコーディング・ソース
package com.example.fukurausagiandroid.tesetfragment

import android.content.Context
import android.net.Uri
import android.os.Bundle
import android.support.v4.app.Fragment
import android.view.LayoutInflater
import android.view.View
import android.view.ViewGroup


// TODO: Rename parameter arguments, choose names that match
// the fragment initialization parameters, e.g. ARG_ITEM_NUMBER
private const val ARG_PARAM1 = "param1"
private const val ARG_PARAM2 = "param2"

/**
 * A simple [Fragment] subclass.
 *
 */
class Fragment_A : Fragment() {

    override fun onCreateView(
        inflater: LayoutInflater, container: ViewGroup?,
        savedInstanceState: Bundle?
    ): View? {
        // Inflate the layout for this fragment
        return inflater.inflate(R.layout.fragment_a, container, false)
    }


}
遷移先表示B用のフラグメントを作成
次の画面を作成。これも先程と同様に、左上にあるappを選択して右クリック。【New】→【Fragment】→【Fragment(Blank)】と選択します。
Fragment Layout Name:fragment_b
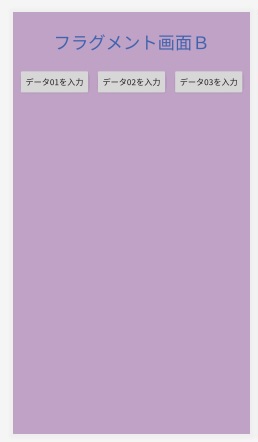
fragment_bのLayout
画面イメージ
構成
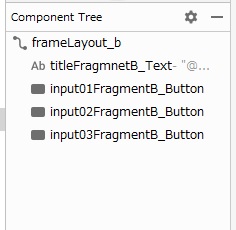
Layoutコーディング・ソース
<?xml version="1.0" encoding="utf-8"?>
<android.support.constraint.ConstraintLayout xmlns:android="http://schemas.android.com/apk/res/android"
                                             xmlns:app="http://schemas.android.com/apk/res-auto"
                                             xmlns:tools="http://schemas.android.com/tools"
                                             android:layout_width="match_parent"
                                             android:layout_height="match_parent"
                                             tools:context=".Fragment_B" android:id="@+id/frameLayout_b"
                                             android:background="@color/backgroundcolorFragment_B">


    <TextView
            android:text="@string/Fragment_B_Txt01"
            android:layout_width="wrap_content"
            android:layout_height="wrap_content"
            android:id="@+id/titleFragmnetB_Text"
            app:layout_constraintTop_toTopOf="parent"
            android:layout_marginTop="32dp" android:textSize="30sp" android:textColor="@color/Fragment_B_TxtColor1"
            app:layout_constraintStart_toStartOf="parent" app:layout_constraintHorizontal_bias="0.5"
            app:layout_constraintEnd_toEndOf="parent"/>
    <Button
            android:text="@string/Fragment_B_Button1"
            android:layout_width="wrap_content"
            android:layout_height="wrap_content"
            android:id="@+id/input01FragmentB_Button"
            app:layout_constraintStart_toStartOf="parent" app:layout_constraintHorizontal_bias="0.5"
            app:layout_constraintEnd_toStartOf="@+id/input02FragmentB_Button" android:layout_marginTop="24dp"
            app:layout_constraintTop_toBottomOf="@+id/titleFragmnetB_Text"/>
    <Button
            android:text="@string/Fragment_B_Button2"
            android:layout_width="wrap_content"
            android:layout_height="wrap_content"
            android:id="@+id/input02FragmentB_Button"
            app:layout_constraintTop_toTopOf="@+id/input01FragmentB_Button"
            app:layout_constraintStart_toEndOf="@+id/input01FragmentB_Button" app:layout_constraintHorizontal_bias="0.5"
            app:layout_constraintEnd_toStartOf="@+id/input03FragmentB_Button"/>
    <Button
            android:text="@string/Fragment_B_Button3"
            android:layout_width="wrap_content"
            android:layout_height="wrap_content"
            android:id="@+id/input03FragmentB_Button"
            app:layout_constraintTop_toTopOf="@+id/input02FragmentB_Button"
            app:layout_constraintStart_toEndOf="@+id/input02FragmentB_Button" app:layout_constraintHorizontal_bias="0.5"
            app:layout_constraintEnd_toEndOf="parent"/>


</android.support.constraint.ConstraintLayout>
クラスfragment_bのコーディング・ソース
package com.example.fukurausagiandroid.tesetfragment


import android.os.Bundle
import android.support.v4.app.Fragment
import android.view.LayoutInflater
import android.view.View
import android.view.ViewGroup


// TODO: Rename parameter arguments, choose names that match
// the fragment initialization parameters, e.g. ARG_ITEM_NUMBER
private const val ARG_PARAM1 = "param1"
private const val ARG_PARAM2 = "param2"

/**
 * A simple [Fragment] subclass.
 *
 */
class Fragment_B : Fragment() {

    override fun onCreateView(
        inflater: LayoutInflater, container: ViewGroup?,
        savedInstanceState: Bundle?
    ): View? {
        // Inflate the layout for this fragment
        return inflater.inflate(R.layout.fragment_b, container, false)
    }


}
遷移先表示C用のフラグメントを作成
次の画面を作成。これも先程と同様に、左上にあるappを選択して右クリック。【New】→【Fragment】→【Fragment(Blank)】と選択します。
Fragment Layout Name:fragment_c
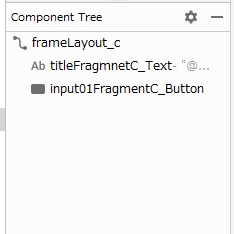
fragment_cのLayout
画面イメージ
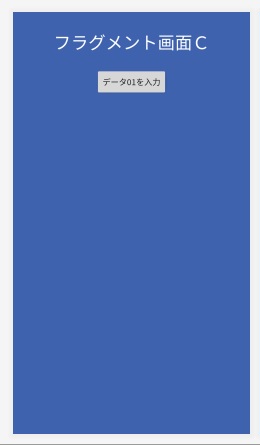
構成
Layoutコーディング・ソース
<?xml version="1.0" encoding="utf-8"?>
<android.support.constraint.ConstraintLayout xmlns:android="http://schemas.android.com/apk/res/android"
                                             xmlns:app="http://schemas.android.com/apk/res-auto"
                                             xmlns:tools="http://schemas.android.com/tools"
                                             android:layout_width="match_parent"
                                             android:layout_height="match_parent"
                                             tools:context=".Fragment_C" android:id="@+id/frameLayout_c"
                                             android:background="@color/backgroundcolorFragment_C">


    <TextView
            android:text="@string/Fragment_C_Txt01"
            android:layout_width="wrap_content"
            android:layout_height="wrap_content"
            android:id="@+id/titleFragmnetC_Text"
            app:layout_constraintTop_toTopOf="parent"
            android:layout_marginTop="32dp" android:textSize="30sp" android:textColor="@color/Fragment_C_TxtColor1"
            app:layout_constraintStart_toStartOf="parent" app:layout_constraintHorizontal_bias="0.5"
            app:layout_constraintEnd_toEndOf="parent"/>
    <Button
            android:text="@string/Fragment_C_Button1"
            android:layout_width="wrap_content"
            android:layout_height="wrap_content"
            android:id="@+id/input01FragmentC_Button"
            app:layout_constraintStart_toStartOf="parent"
            app:layout_constraintHorizontal_bias="0.5" app:layout_constraintEnd_toEndOf="parent"
            android:layout_marginTop="24dp" app:layout_constraintTop_toBottomOf="@+id/titleFragmnetC_Text"/>


</android.support.constraint.ConstraintLayout>
クラスfragment_cのコーディング・ソース
package com.example.fukurausagiandroid.tesetfragment


import android.os.Bundle
import android.support.v4.app.Fragment
import android.view.LayoutInflater
import android.view.View
import android.view.ViewGroup


// TODO: Rename parameter arguments, choose names that match
// the fragment initialization parameters, e.g. ARG_ITEM_NUMBER
private const val ARG_PARAM1 = "param1"
private const val ARG_PARAM2 = "param2"

/**
 * A simple [Fragment] subclass.
 *
 */
class Fragment_C : Fragment() {

    override fun onCreateView(
        inflater: LayoutInflater, container: ViewGroup?,
        savedInstanceState: Bundle?
    ): View? {
        // Inflate the layout for this fragment
        return inflater.inflate(R.layout.fragment_c, container, false)
    }


}
その他のコーディング・ソース
その他として文字列定義用:strings.xmlとカラー定義用:colors.xmlを掲載します。参考にどうぞ。
strings.xml
<resources>
    <string name="app_name">TesetFragment</string>

    <string name="activity">MainActivity</string>
    <string name="button_a">画面Aを表示</string>
    <string name="button_b">画面Bを表示</string>
    <string name="button_c">画面Cを表示</string>


    <!-- fragment_a -->
    <string name="Fragment_A_Txt01">フラグメント画面A</string>
    <string name="Fragment_A_Button1">データAを入力</string>
    <string name="Fragment_A_Button2">データBを入力</string>

    <!-- fragment_b -->
    <string name="Fragment_B_Txt01">フラグメント画面B</string>
    <string name="Fragment_B_Button1">データ01を入力</string>
    <string name="Fragment_B_Button2">データ02を入力</string>
    <string name="Fragment_B_Button3">データ03を入力</string>

    <!-- fragment_c -->
    <string name="Fragment_C_Txt01">フラグメント画面C</string>
    <string name="Fragment_C_Button1">データ01を入力</string>


</resources>
colors.xml
<?xml version="1.0" encoding="utf-8"?>
<resources>
    <color name="colorPrimary">#008577</color>
    <color name="colorPrimaryDark">#00574B</color>
    <color name="colorAccent">#D81B60</color>

    <color name="backgroundcolorMainScreen">#716246</color>
    <color name="backgroundcolorFragmentView">#00574B</color>

    <!-- fragment_a -->
    <color name="backgroundcolorFragment_A">#FFFFFF</color>
    <color name="Fragment_A_TxtColor1">#3E62AD</color>


    <!-- fragment_b -->
    <color name="backgroundcolorFragment_B">#C0A2C7</color>
    <color name="Fragment_B_TxtColor1">#3e62ad</color>


    <!-- fragment_c -->
    <color name="backgroundcolorFragment_C">#3e62ad</color>
    <color name="Fragment_C_TxtColor1">#FFFFFF</color>


</resources>
まとめ
おおまかなテスト用に作成したモノですが、概ね思い描いた感じにできあがり感無量
ホッε-(´∀`; )
今まで散々悩んできたのが嘘みたいなブレイクスルーです。w
このあとは、このテストアプリ?に手を加えていろいろと弄ってみたいと思う。当面の目標としては・・・
といったことをやってみたい。
まぁ、次はいつできるかだが・・・・www
頑張っていこうと思う。


コメント